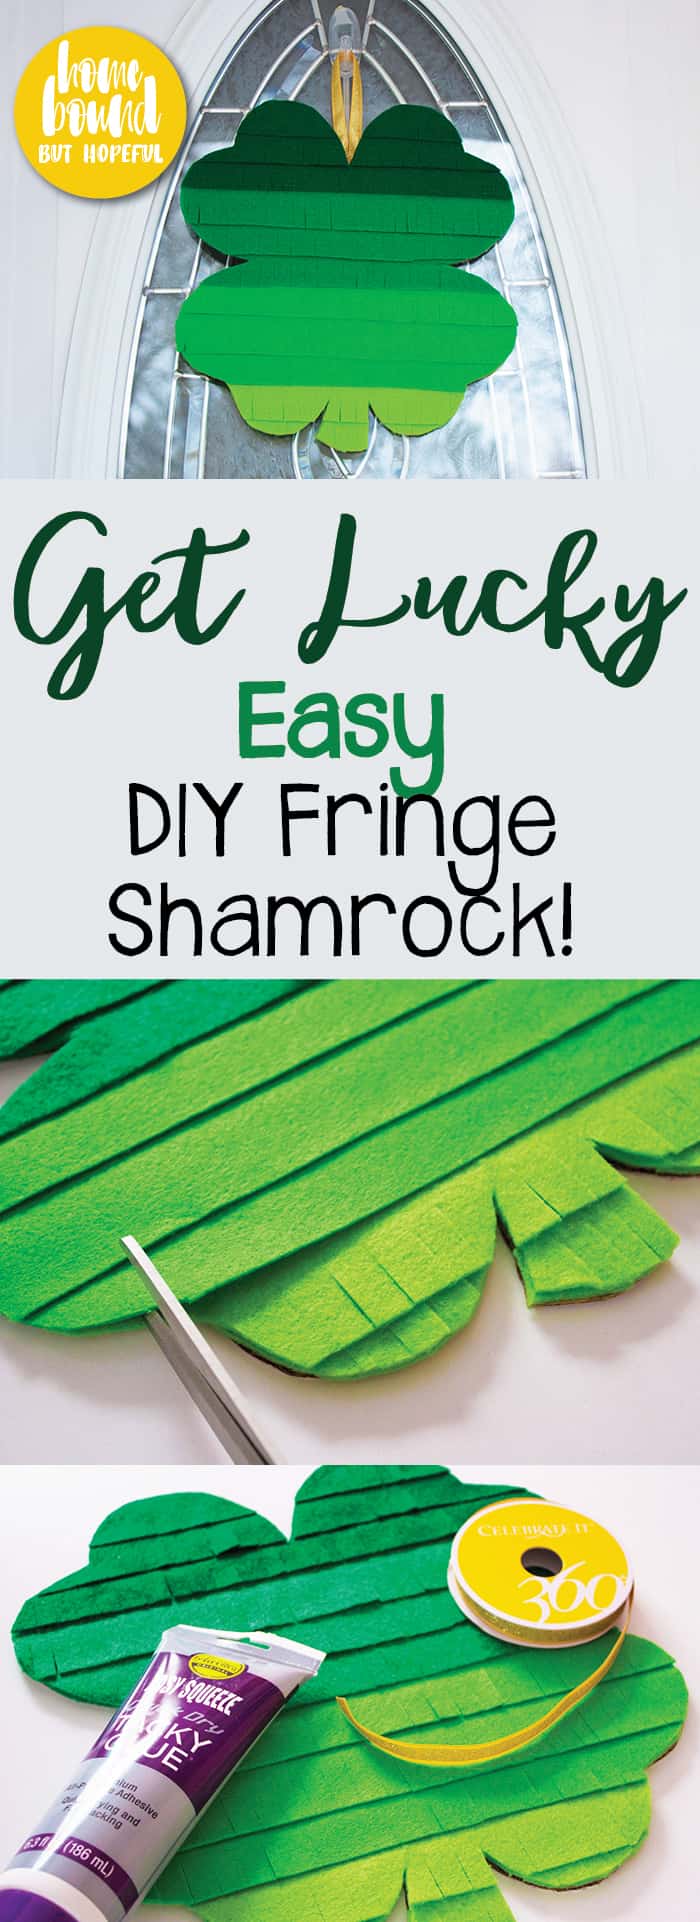
Get Lucky this St. Patrick’s Day- Easy DIY Shamrock With Fringe
I like to find little ways to make even minor holidays extra special for my kiddos. One small way I try to make the house a bit festive is to change the decorations hanging on the front door every month or so. Despite a few years of looking, I’ve never found a St. Patrick’s Day hanging I truly loved, so this year I finally took matters into my own hands. Today I’m sharing my new easy DIY shamrock decoration with you. The project is simple and inexpensive, and comes together quickly. The fringe is a cute and fun detail that adds a little bit of movement to the hanging. Read on to see how fast and manageable this project really is!
Easy DIY Shamrock Supplies
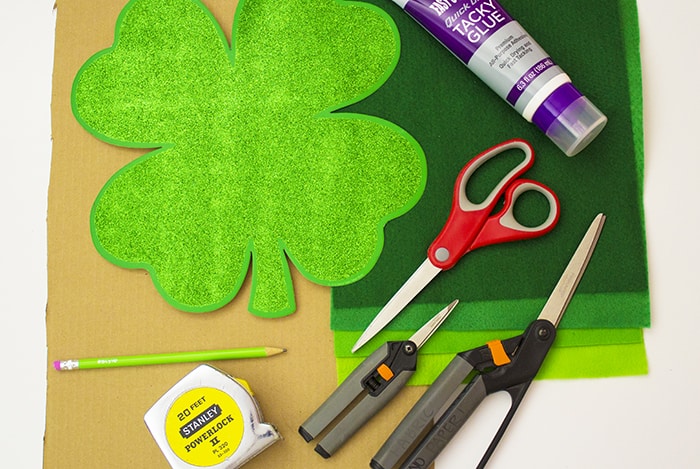
- Base material. I used a piece of old cardboard from a box of printer paper. Go green & recycle something for this. (Get it?! Green?! St. Patrick’s Day! Ha, I’m a nerd!)
- Craft glue. (Or hot glue. I avoid hot glue because I really value my fingertips. However more coordinated crafters will most likely have quicker results with hot glue).
- Green felt sheets, in as many or as few shades as you would like.
- Ruler, or tape measure if your ruler has suddenly gone MIA like mine. (#hotmessmom, right here).
- Pencil or pen.
- Ribbon, yarn, or twine for hanger.
- Scissors. (I used craft scissors and fabric scissors).
- Optional- pre-made shamrock cut out as a template.
Here’s How!
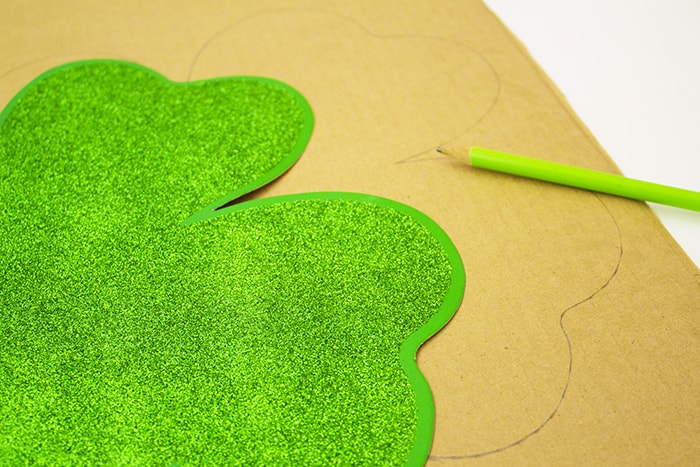
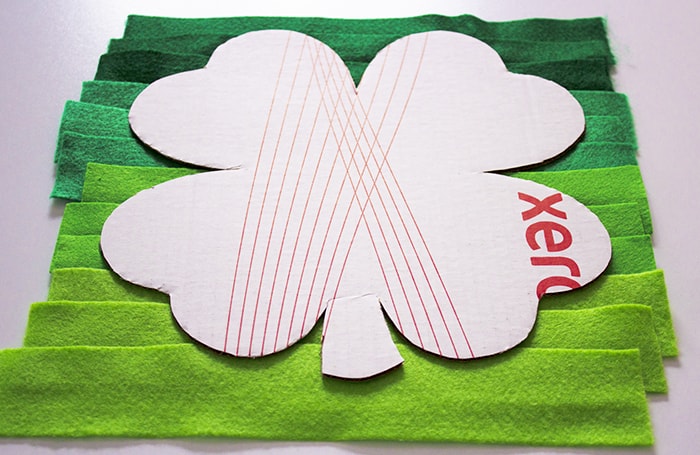
1. Use your pencil or pen to sketch out your shamrock shape on your cardboard base. I used a cheap pre-cut shamrock we had an hand from the dollar store as a template to trace. (The size and shape were perfect, but it wasn’t sturdy enought to use as the base for this craft.) Cut the shamrock base out with your scissors. (Hint: you do not want your shamrock to be wider than your felt, so keep that in mind during this step!)
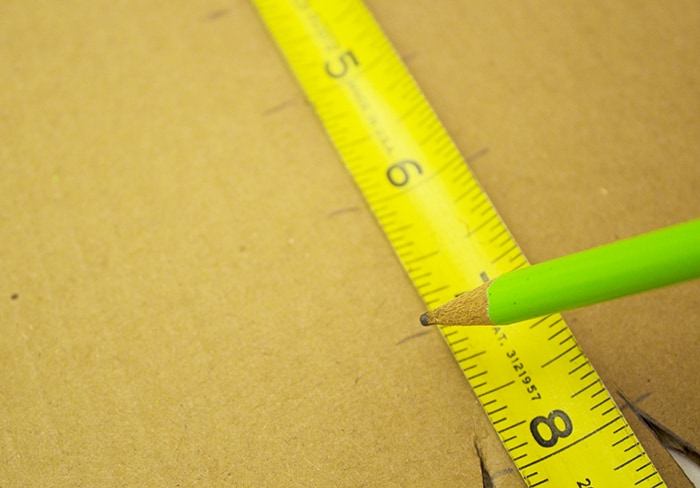
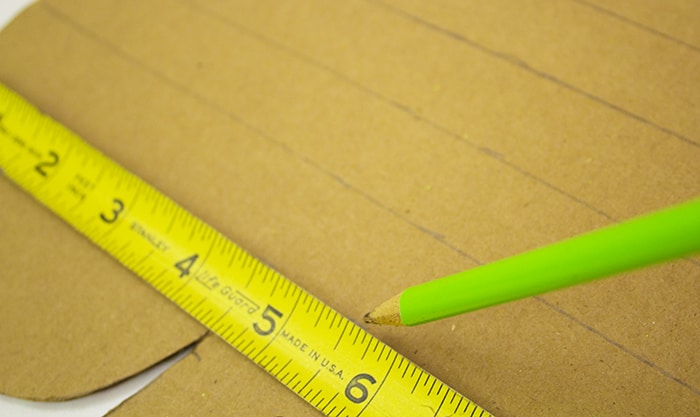
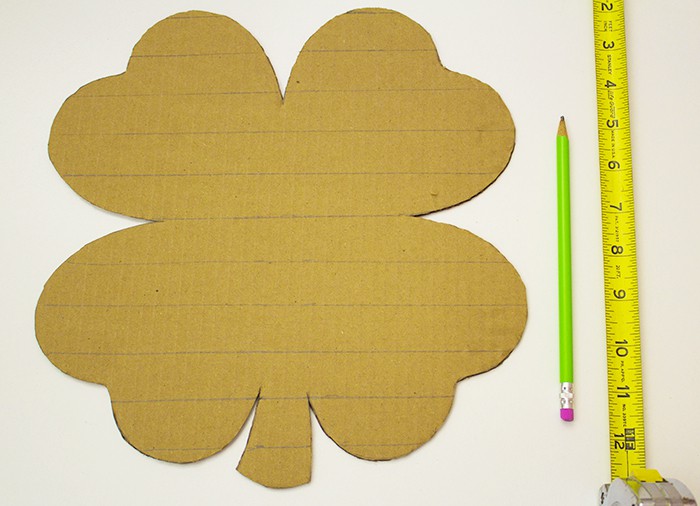
2. Next, I used my tape measure to mark off roughly 1 inch segments down the shamrock. I wanted this project to be low stress and easy, so I didn’t worry about perfectly straight lines that were exactly 1 inch apart. There’s a little wiggle room here, so don’t let the details make you nuts. I drew guidelines horizontally across the shamrock around 1 inch apart.
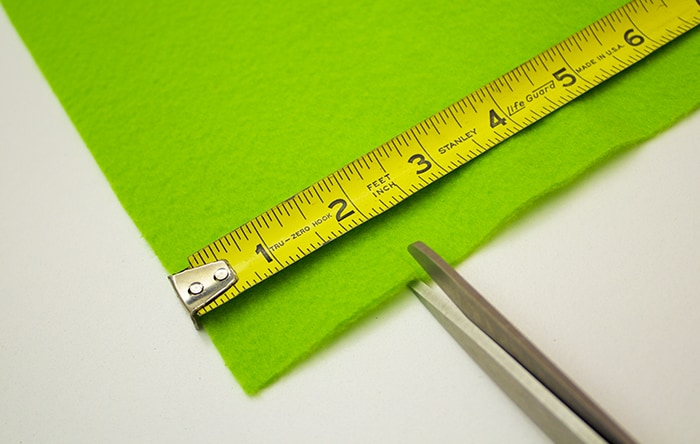
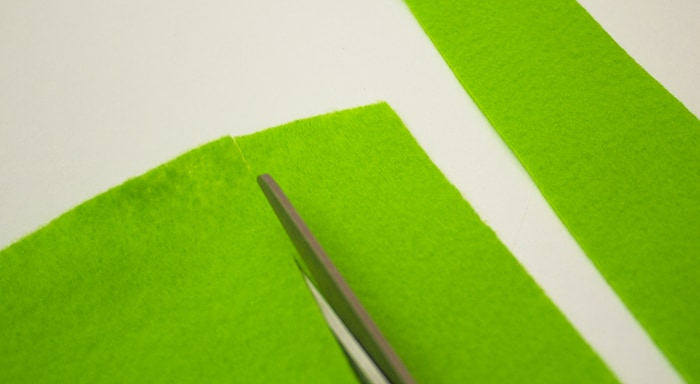

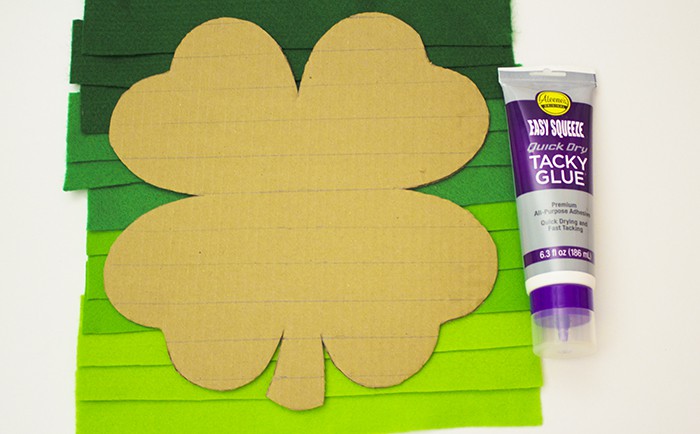
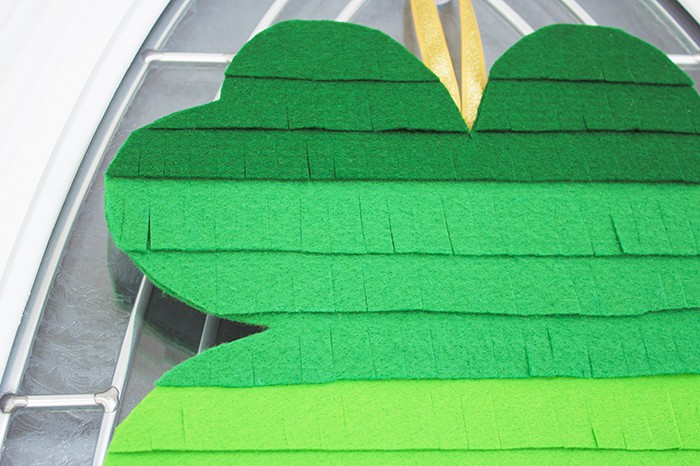
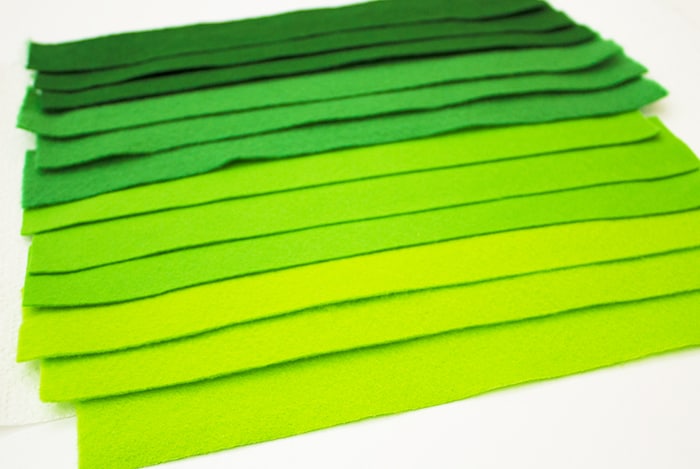
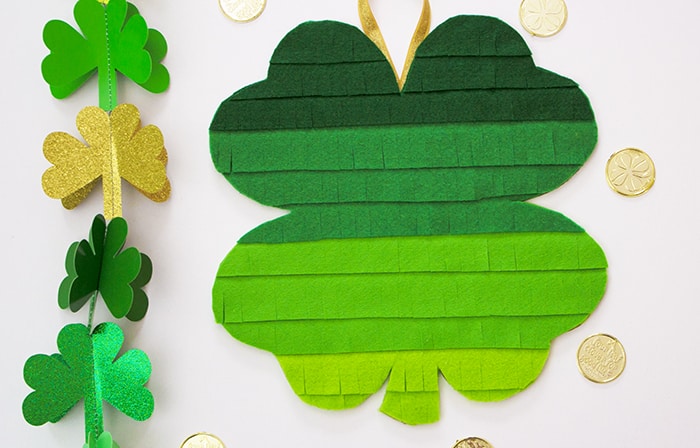
3. I used my tape measure to make small snips on the felt, with the aim of cutting relatively straight strips around 2 inches wide. Again, I kept this project laid back. If you want to be precise, a cutting mat, rotary cutter, and grid ruler will make perfect 2 inch strips for you quickly. Take the approach that feels right for you. You will want one 2 inch strip of felt for each guideline on your shamrock. Consider the pattern or layout you would like to use while you’re cutting. I chose an ombre feel, cutting around 3 strips of each of my 4 tones of green felt.
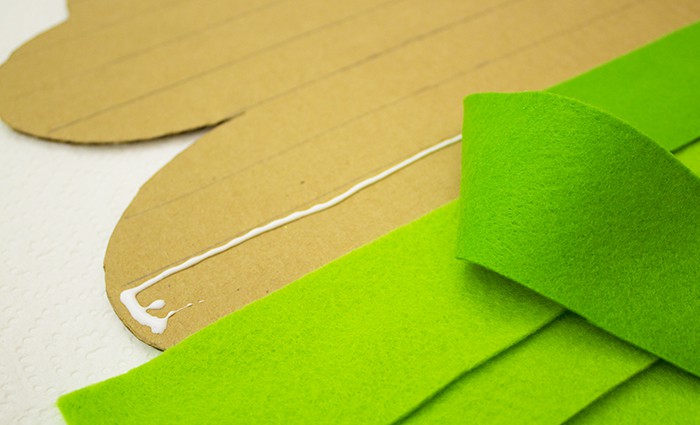
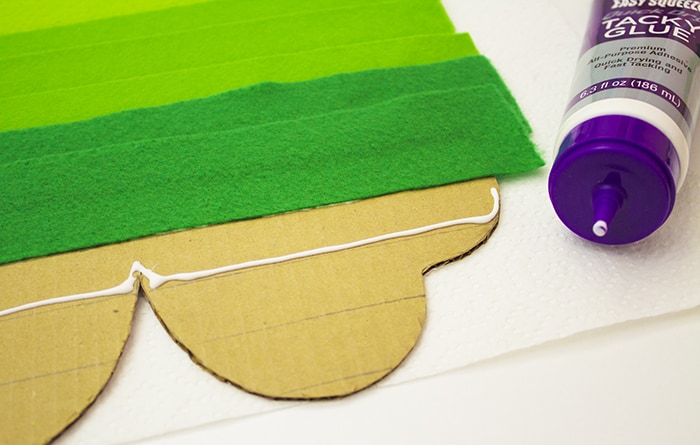
4. Next, use the glue to attach your felt strips to the base one at a time. Start from the bottom of the base and work up. Run the glue along the guideline, as well as down the sides a bit. Attach each felt strip, and allow the glue to dry completely.
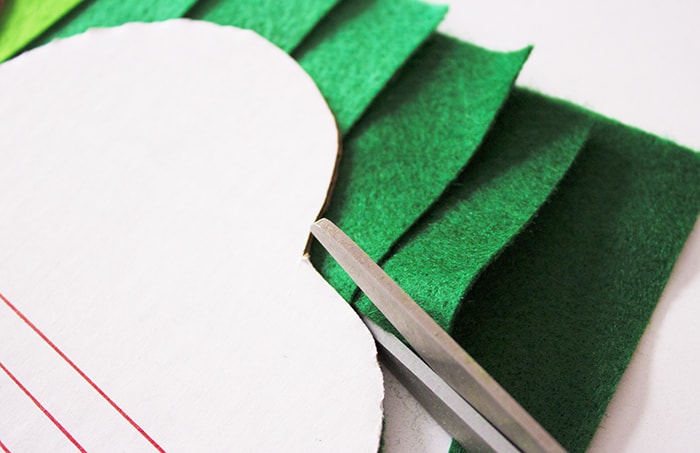
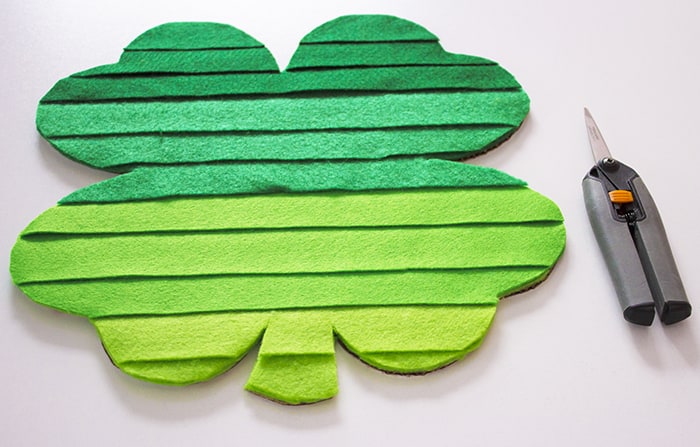
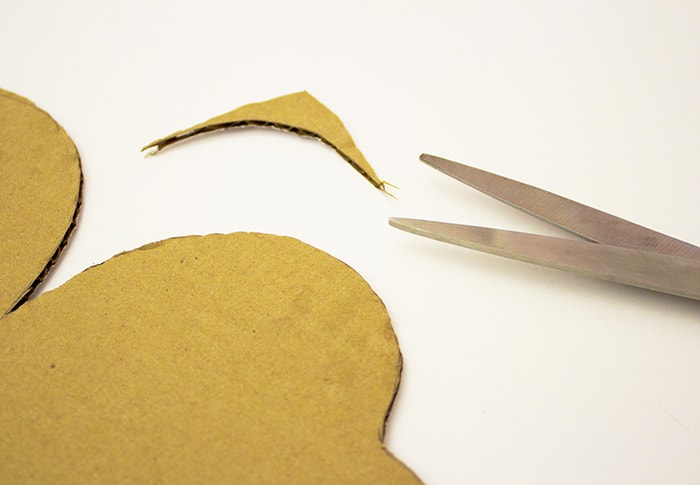
5. After the glue is finally dry, you can begin to trim the excess off the sides with your scissors. I found it worked best to cut off the majority of the excess first. Then I went back to trim more carefully and closely with finer scissors.
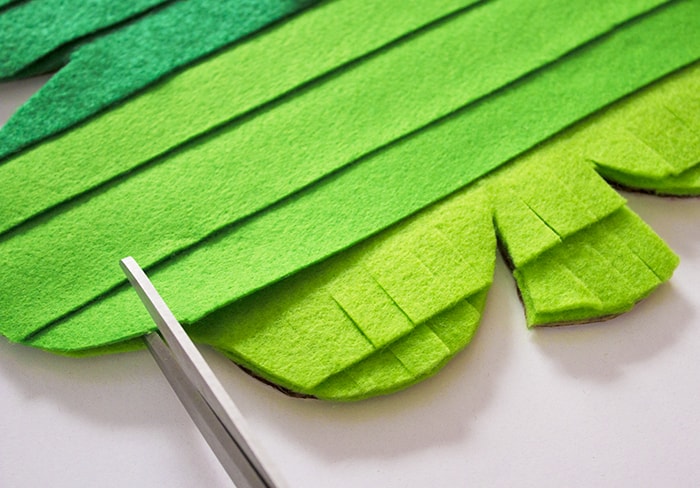
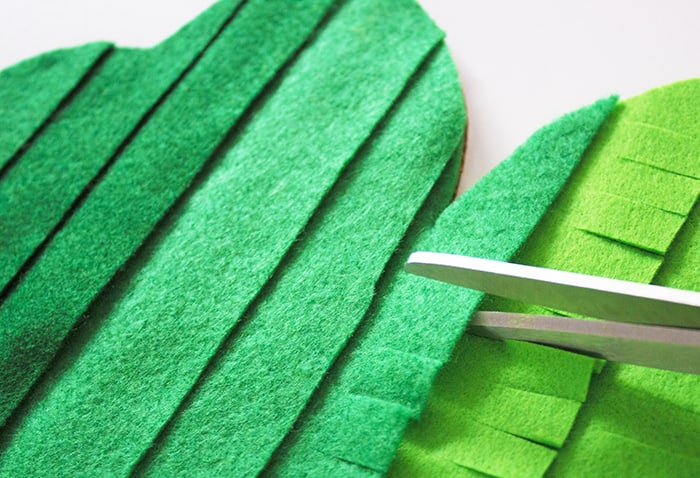
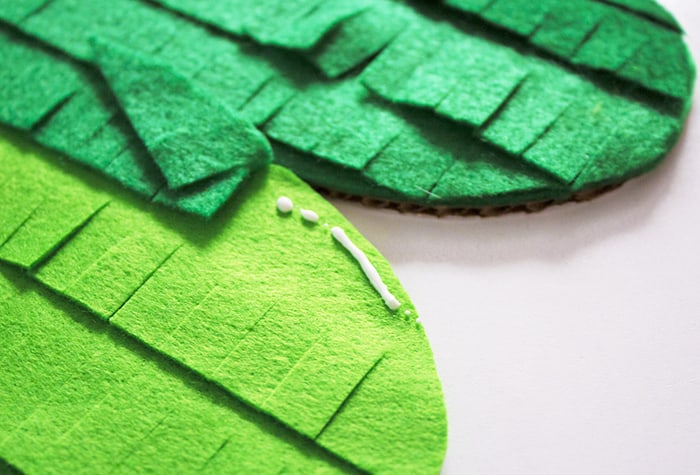
6. Up next is the most fun step, which will add a little novelty and dimension to the easy DIY shamrock craft. Use your scissors to cut fringe into each layer of felt. Be careful at any curved shamrock edges- you don’t want to cut the ends of the felt strips off! This is the time to check for any edges that may be a little loose. Loose edges are likely to be at some of the shamrock’s curves. If you find one, just add a little more glue to the edge to better secure the felt.

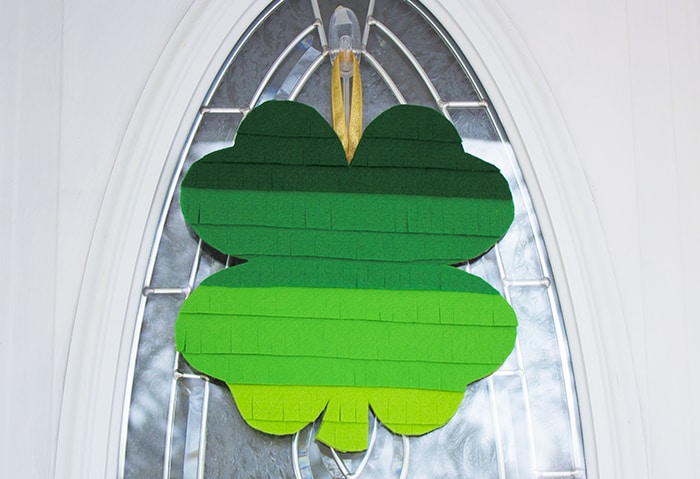
7. Finally, attach a hanger of some kind to the back of your shamrock. I chose a metallic gold ribbon, since it seemed appropriate for the holiday. Rainbow printed ribbon would also be super cute and fun! String, twine, or yarn would all be other good options. When the glue for your hanging loop is totally dry, you are ready to hang your lucky 4 leaf clover.
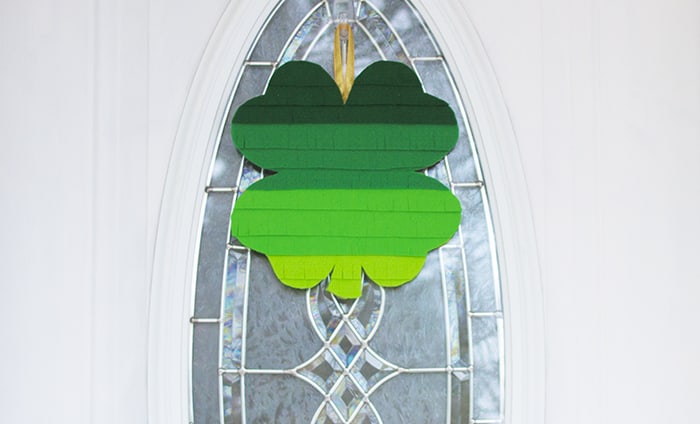

I hope you enjoyed this easy DIY shamrock project! With any luck, it will bring St. Patrick’s Day spirit and maybe even some leprechauns to your home as well!
Be on the look out for more leprechaun antics and St. Patrick’s Day fun!
Does your family do anything special for St. Patrick’s Day? I’d love to hear about it in the comments!


Belle
Such a cute DIY project!
Belle | One Awesome Momma
Kate
Thanks so much, Belle!
Lindsey
How stinkin’ cute is this?! And it looks doable for those of us who aren’t too crafty! Thanks!!
Kate
Thanks Lindsey! It’s definitely a very manageable project for crafters at all skill levels.
Lisa Elaine
Awe I love this!! Going to try this out with my students!!!
Kate
I hope they have fun with it! Thanks!
roseclearfield
How sweet and simple! I love the ombre effect.
Kate
Thank you, Rose!
Vicki @ Babies to Bookworms
This is so cute! I love easy crafts, and I am so ready for the bright greens of St. Patrick’s Day after the gray snow of February!
Kate
Oh my gosh, me too! Gimme all the greens, golds, and rainbows, stat!
amybeeman77
Super cute idea! Love that the kids can help with it.
Kate
Thanks so much Amy!
ajonsson31
This is so cute! Thanks for sharing!
Kate
Thanks for checking it out!
Mamaguru
I adore this craft! The ombre is so fun. Pinning!!
Kate
Thanks so much Rebecca!
Beth
Love the green ombre! Turned out cute!
Kate
Thank you Beth!
Christina Rambo
Oh! This is cute and totally a great craft for my girl to practice scissor skills — we will just do with paper!!
Kate
It’s perfect for scissor skills- paper for younger kiddos, and fabric for older ones, since cutting fabric is much tougher! Thanks Christina!
Allison
Just sent this one to my sister, perfect for her kids and filing it away for mine gets old enough!
Kate
Thanks so much, Allison!
Angela
Love the ombre effect in the background! This is perfect for upcoming St. Patrick’s Day
Kate
Glad you like it! Thanks Angela!
Danielle
I love this! Such a cute way to add a little fun to your house.
Kate
Thanks Danielle!
itsahero
This is such a fun and clever idea! I can’t wait to do this with my little one!
Kate
Thanks so much, Rachel!